
承接範例專案:電話字 (Sample Project: Phoneword),再來就是解釋它怎麼運作,包含Xamarin介面和C#程式碼,還有很重要的是Xamarin.iOS Application的剖析。

- References – Contains the assemblies required to build and run the application. If we expand the directory, we’ll see references to .NET assemblies such as System , System.Core, and System.Xml , as well as a reference to Xamarin’s Xamarin.iOS assembly.
- Components – The Components directory houses ready-made features from the Xamarin Components store , a public marketplace for Xamarin code. This is similar to the NuGet Gallery for those familiar with Visual Studio. For more information on Xamarin Components, refer to the Xamarin Components walkthrough .
- Resources – The Resources folder stores icons, launch images, and other media. Xamarin has a separate guide for Working with Resources that explores the role of this directory further.
- Main.cs – This contains the main entry point of the application. To start the application, we pass in the name of the main application class, the AppDelegate .
- AppDelegate.cs – This file contains the main application class and is responsible for creating the Window, building the user interface, and listening to events from the operating system.
- MainStoryboard.storyboard – The Storyboard contains the visual design of the application’s user interface. Storyboard files open in a graphical editor called the iOS Designer.
- Phoneword_iOSViewController.cs – The View Controller powers the screen (View) that a user sees and touches. The View Controller is responsible for handling interactions between the user and the View.
- Phoneword_iOSViewController.designer.cs – The designer.cs is an auto-generated file that serves as the glue between controls in the View and their code representations in the View Controller. Because this is an internal plumbing file, the IDE will overwrite any manual changes and most of the time we can ignore this file. For more information on the relationship between the visual Designer and the backing code, refer to the Introduction to the iOS Designer guide.
- Info.plist – Info.plist is where we set application properties such as the application name, icons, launch images, and more. This is a powerful file and a thorough introduction to it is available in theWorking with Property Lists guide.
- Entitlements.plist – The entitlements property list lets us specify application capabilities (also called App Store Technologies) such as iCloud, PassKit, and more. More information on theEntitlements.plist can be found in the Working with Property Lists guide. For a general introduction to entitlements, refer to the Device Provisioning guide.
看起來和Xcode裡的檔案架構很類似呢!學習來格外輕鬆~
Xamarin Studio的介面真的跟Xcode很像,而且它還可以選擇語系,不過為了未來查詢問題方便,我還是使用英文介面。
iOS Designer and Storyboards

Single View Application
Document Outline

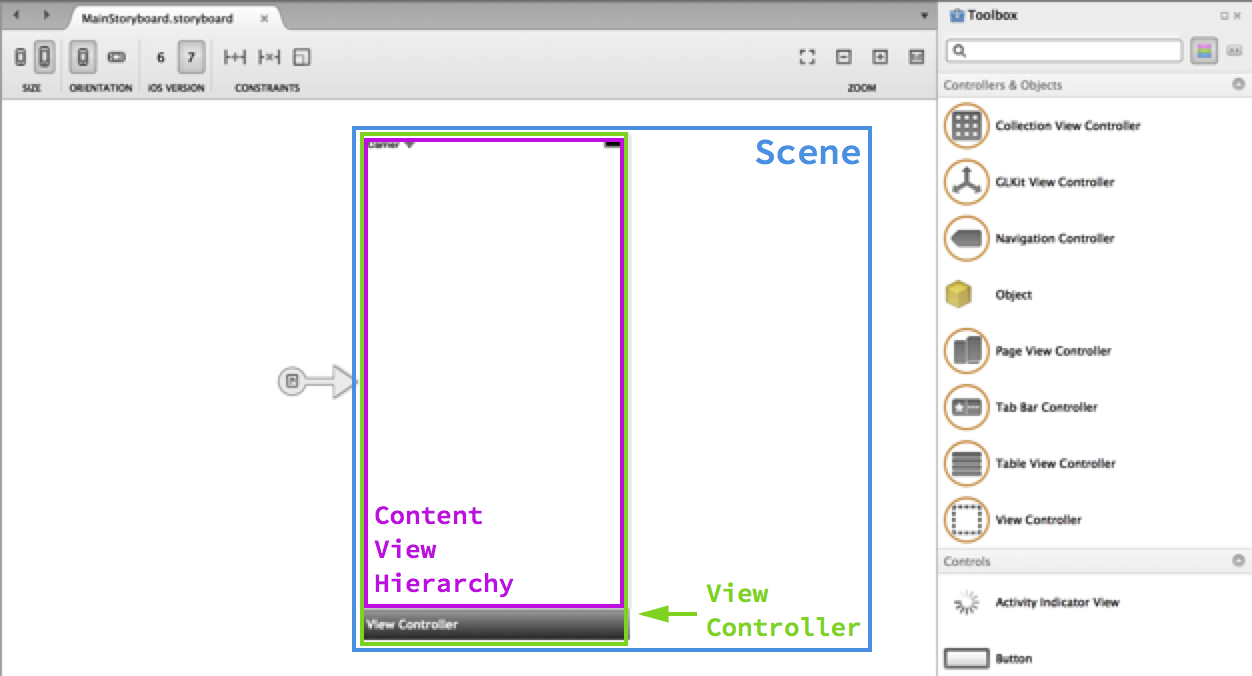
Scene and Subviews

Content View Hierarchy

Relationships between the Window, Views, Subviews, and View Controller

From code to screen

再來說明一下,它跟Xcode不一樣的地方,就是不用拉藍色線來跟變數產生連結。
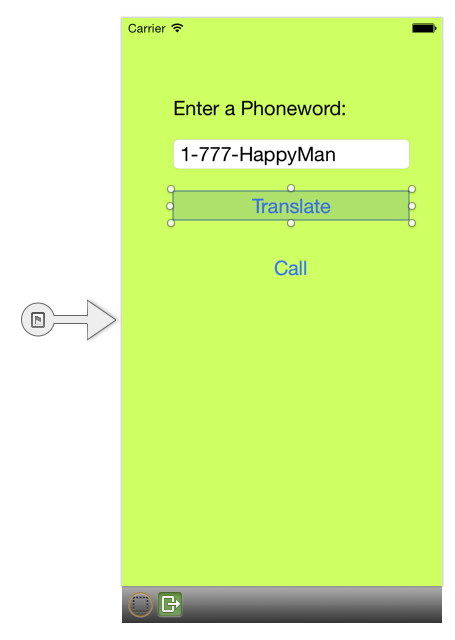
替代做法是在Widget->identity->Name取好變數名稱,即可在view controller中使用該變數呢!

記得:MainStoryboard.storyboard中要設定class為MainStoryboard.storyboard.cs,如此就能以auto-complete來打出連結元件的變數,如TranslateButton。
參考:Part 2: Deep Dive | Xamarin。

Comments on: "[Xamarin][iOS] 深度了解專案:電話字 (Sample Project: Phoneword)" (1)
[…] 承接深度了解專案:電話字 (Sample Project: Phoneword),再來學習多螢幕架構,同樣也是跟Xcode非常相似的做法,看到介面很快就能上手! […]
讚讚