
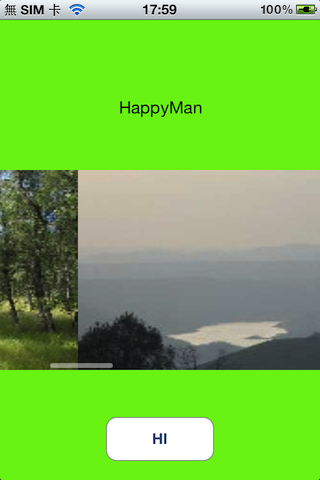
當我們有很多相片想要逐一欣賞時,我們會想要左翻右翻來看下一張上一張的相片,此時ScrollView就是一個很適合的做法!而程式碼其實也相當簡單~
原本的程式碼直接產生ScrollView,然而我把它改成用IB來產生,只要將宣告IBOutlet ScrollView連結到IB ScrollView即可作用!
.h檔程式碼
@property (nonatomic, retain) IBOutlet UIScrollView *unitScrollView;
.m檔程式碼
- (void)viewDidLoad
{
[super viewDidLoad];
// Do any additional setup after loading the view, typically from a nib.
self.view.backgroundColor = [UIColor greenColor];
// setup the scrollview for multiple images and add it to the view controller
//
// note: the following can be done in Interface Builder, but we show this in code for clarity
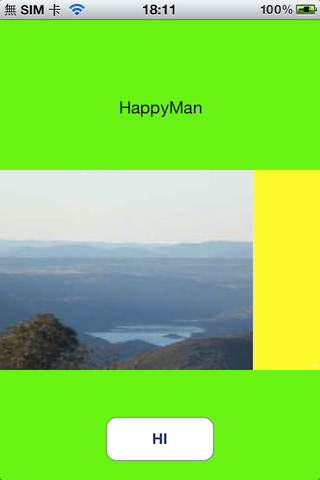
[self.unitScrollView setBackgroundColor:[UIColor yellowColor]];
[self.unitScrollView setCanCancelContentTouches:NO];
self.unitScrollView.indicatorStyle = UIScrollViewIndicatorStyleWhite;
self.unitScrollView.clipsToBounds = YES; // default is NO, we want to restrict drawing within our scrollview
self.unitScrollView.scrollEnabled = YES;
// pagingEnabled property default is NO, if set the scroller will stop or snap at each photo
// if you want free-flowing scroll, don't set this property.
self.unitScrollView.pagingEnabled = YES;
// load all the images from our bundle and add them to the scroll view
NSUInteger i;
for (i = 1; i <= kNumImages; i++)
{
NSString *imageName = [NSString stringWithFormat:@"image%d.jpg", i];
UIImage *image = [UIImage imageNamed:imageName];
UIImageView *imageView = [[UIImageView alloc] initWithImage:image];
// setup each frame to a default height and width, it will be properly placed when we call "updateScrollList"
CGRect rect = imageView.frame;
rect.size.height = kScrollObjHeight;
rect.size.width = kScrollObjWidth;
imageView.frame = rect;
imageView.tag = i; // tag our images for later use when we place them in serial fashion
[self.unitScrollView addSubview:imageView];
}
[self layoutScrollImages]; // now place the photos in serial layout within the scrollview
}
const CGFloat kScrollObjHeight = 200.0;
const CGFloat kScrollObjWidth = 320.0;
const NSUInteger kNumImages = 5;
- (void)layoutScrollImages
{
UIImageView *view = nil;
NSArray *subviews = [self.unitScrollView subviews];
// reposition all image subviews in a horizontal serial fashion
CGFloat curXLoc = 0;
for (view in subviews)
{
if ([view isKindOfClass:[UIImageView class]] && view.tag > 0)
{
CGRect frame = view.frame;
frame.origin = CGPointMake(curXLoc, 0);
view.frame = frame;
curXLoc += (kScrollObjWidth);
}
}
// set the content size so it can be scrollable
[self.unitScrollView setContentSize:CGSizeMake((kNumImages * kScrollObjWidth), [self.unitScrollView bounds].size.height)];
}
上述程式碼有許多特性可以設定:
- setBackgroundColor
- setCanCancelContentTouches
- .indicatorStyle
- .clipsToBounds
- .scrollEnabled
- .pagingEnabled
這些效果親自玩過就知道囉~只是有一個問題,就是我無法知道使用者翻到哪一張,所以只好另尋它法,因為我想要讓使用者點下去那一張,就有對應的反應。
其實只要在.h檔中加入<UIScrollViewDelegate>這個delegate,並在.m檔實作scrollViewDidScroll:這個method,即可得知當前使用者翻、滾、滑到哪個頁面,記得將IB中的ScrollView連結到File’s Owner,而程式碼就這麼寫:
-(void)scrollViewDidScroll:(UIScrollView *)scrollView
{
CGFloat width = scrollView.frame.size.width;
NSInteger currentPage = ((scrollView.contentOffset.x - width / 2) / width) + 1;
NSLog(@"currentPage:%i",currentPage);
}
當使用者翻、滾、滑動ScrollView時,立刻會有反應訊息出現:
2013-03-08 12:28:33.347 Tarot[5502:907] currentPage:3
參考:

隨意留個言吧:)~